ALLIED UNITS


Chrono Miner Humvee Avenger Bullfrog IFV Grizzly Tank M1A1 Abrams Laser Tank Mobile Gap Generator Ambulance Allied MCV Sonic Tank Prism Tank Battle Fortress Mirage Tank Tomahawk Blackhawk Transport Comanche Hovercraft Destroyer Dolphin Aegis Cruiser Hailstorm Shatterer Aircraft Carrier


Chrono Miner

Chrono Miner

Harvester unit with protected armor, preventing mind control and driver snipes.

In contrary to all other miners, this miner can teleport back to an allied refinery.

TIP: When your miners need to retreat, make use of their special ability to teleport them to safety!


  • HP: 784
  • Cost: 1040
  • Armor: T2 Medium
  • Role: Miner
  • Upgrades: N/A
  • Power: N/A
  • Prerequisite: War Factory, Refinery
  • Primary Weapon: N/A
  • Secondary Weapon: N/A


Humvee

Humvee

Standard unit.
While the humvee is opentopped, it can only carry Tier 1 anti-infantry units like the G.I. or the Ranger.
Even though this limit exists, it's still great at mowing down enemy infantry.


  • HP: 200
  • Cost: 450
  • Armor: Light
  • Role: Anti Infantry
  • Upgrades: TOW Missiles
  • Power: N/A
  • Prerequisite: War Factory
  • Primary Weapon: Machine Gun
  • Secondary Weapon: N/A
Avenger IFV

Avenger

Anti Air and stealth detection unit.


The IFV changes its turret, depending on which infantry is inside. This makes the IFV very flexible and useful against many different targets.


  • HP: 280
  • Cost: 700
  • Armor: Light
  • Role: Anti Air, IFV
  • Upgrades: N/A
  • Power: N/A
  • Prerequisite: War Factory
  • Primary Weapon: Precision Lasers
  • Secondary Weapon: N/A
Bullfrog IFV

Bullfrog IFV

Anti air and stealth detector unit.


The IFV changes its turret, depending on which infantry is inside. This makes the IFV very flexible and useful against many different targets.


  • HP: 245
  • Cost: 600
  • Armor: Light
  • Role: Anti Air, IFV
  • Upgrades: N/A
  • Power: N/A
  • Prerequisite: War Factory
  • Primary Weapon: Homing Missiles
  • Secondary Weapon: N/A
Grizzly Tank

Grizzly Tank

Standard MBT.


  • HP: 420
  • Cost: 700
  • Armor: Heavy
  • Role: Anti Armor
  • Upgrades: N/A
  • Power: N/A
  • Prerequisite: War Factory
  • Primary Weapon: 90mm Shells
  • Secondary Weapon: N/A
M1A1 Abrams

M1A1 Abrams

Tier 2 standard MBTs.


  • HP: 560
  • Cost: 950
  • Armor: T2 Heavy
  • Role: Anti Armor
  • Upgrades: N/A
  • Power: N/A
  • Prerequisite: War Factory, Armory
  • Primary Weapon: 125mm Shells
  • Secondary Weapon: N/A
Laser Tank

Laser Tank

T2 MBT laser edition. Can be upgraded with Spectrum Shields for more HP.


  • HP: 400
  • Cost: 900
  • Armor: T2 Heavy
  • Role: Anti Ground
  • Upgrades: Spectrum Shield
  • Power: N/A
  • Prerequisite: War Factory, Arsenal
  • Primary Weapon: AP Shard Laser Gun
  • Secondary Weapon: N/A
Mobile Gap Generator

Mobile Gap Generator

Gap Generator support unit.

Like a Gap Generator, this unit can reshroud the map when deployed. Because of this, it's often smart to reposition it every now and then to keep reshrouding parts of the map.


  • HP: 280
  • Cost: 1200
  • Armor: T2 Light
  • Role: Support
  • Upgrades: N/A
  • Power: N/A
  • Prerequisite: War Factory, Arsenal
  • Primary Weapon: N/A
  • Secondary Weapon: N/A


Ambulance

Ambulance

Support power unit.

The Ambulance can only be spawned on the map when using the support power.


  • HP: 200
  • Cost: 500
  • Armor: Light
  • Role: Infantry Heal
  • Upgrades: N/A
  • Power: N/A
  • Prerequisite: Arsenal
  • Primary Weapon: Field Medkit
  • Secondary Weapon: N/A
Allied MCV

Allied MCV

MCV unit with protected armor, preventing mind control and driver snipes.

Can deploy into a Construction Yard.


  • HP: 1400
  • Cost: 2500
  • Armor: Heavy
  • Role: MCV
  • Upgrades: N/A
  • Power: N/A
  • Prerequisite: War Factory, Radar
  • Primary Weapon: N/A
  • Secondary Weapon: N/A
Prism Tank

Prism Tank

T3 long range siege unit.
The prism tank has always been a dangerous tank, however the amount of extra enemies it can hit when it has achieved elite status makes any of them a target you want to focus down.


  • HP: 245
  • Cost: 1400
  • Armor: T3 Light
  • Role: Siege
  • Upgrades: Spectrum Shield
  • Power: N/A
  • Prerequisite: War Factory, Battle Lab
  • Primary Weapon: Focused Shard Lasers
  • Secondary Weapon: N/A
Sonic Tank

Sonic Tank

Hidden Allied siege unit.
The sonic tank is not directly available to the Allied forces, but can be obtained via the Secret Lab or by capturing an Allied War Factory as another faction.


It shares weapons with the Shatterer.


  • HP: 280
  • Cost: 1200
  • Armor: T3 Light
  • Role: Siege
  • Upgrades: N/A
  • Power: N/A
  • Prerequisite: War Factory, Battle Lab
  • Primary Weapon: Sonic Beam Weapon
  • Secondary Weapon: N/A
Battle Fortress

Battle Fortress

Opentopped unit.
While not at all a big deal on its own, the Battle Fortress excels whenever there is infantry inside. From a potato to a powerhouse, the Battle Fortress and its occupants will generally be devastating on the battlefield.

TIP: When using Battle Fortresses, always make sure to pay attention to your opponent's army to make sure that the infantry you put inside of them will be the most helpful against his specific army.


  • HP: 840
  • Cost: 1900
  • Armor: T3 Heavy
  • Role: Field Support
  • Upgrades: N/A
  • Power: N/A
  • Prerequisite: War Factory, Battle Lab
  • Primary Weapon: Machine Gun
  • Secondary Weapon: N/A


Mirage Tank

Mirage Tank

Disguise unit.
The mirage tank is capable of disguising itself as a tree, often making it a great unit to ambush your enemies.

Attacks melt its target's armor for 6 seconds and stacks with other Mirage Tanks.
Attacks also target 1 additional target.


  • HP: 280
  • Cost: 1100
  • Armor: T3 Light
  • Role: Anti Infantry
  • Upgrades: N/A
  • Power: N/A
  • Prerequisite: War Factory, Battle Lab
  • Primary Weapon: Heat Ray
  • Secondary Weapon: N/A


Tomahawk

Tomahawk

Standard unit.
While not necessarily doing devastating damage, the Tomahawk's long range homing missile is great for wittling down your enemies.
Roles: Anti-Building


  • HP: 280
  • Cost: 1400
  • Armor: T3 Medium
  • Role: Siege
  • Upgrades: N/A
  • Power: N/A
  • Prerequisite: War Factory, Battle Lab
  • Primary Weapon: Tomahawk Missile
  • Secondary Weapon: N/A
Blackhawk Transport

Blackhawk Transport

Flying transport unit.
Being the only transport unit that can fly, the Blackhawk often allows you to position your troops where generally no one else can. Make sure to use these advantages whenever possible.
Roles: Transport


  • HP: 225
  • Cost: 1000
  • Armor: Light
  • Role: Transport
  • Upgrades: N/A
  • Power: N/A
  • Prerequisite: War Factory, Airfield
  • Primary Weapon: Machine Gun
  • Secondary Weapon: N/A
Comanche

Comanche

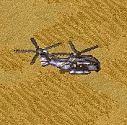
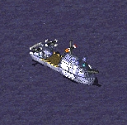
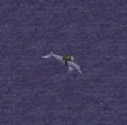
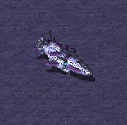
Flying siege and stealth detection unit.
While often not extremely dangerous on their own, comanches excel in groups, making them dangerous to both infantry and buildings.
Roles: Anti-Infantry, Anti-Building, Stealth Detection


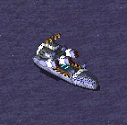
Germany has a Laser Gun variant of the Comanche.

  • HP: 280
  • Cost: 900
  • Armor: T2 Medium
  • Role: Ground Support
  • Upgrades: N/A
  • Power: N/A
  • Prerequisite: War Factory, Arsenal
  • Primary Weapon: Machine Gun
  • Secondary Weapon: Missiles/Laser Gun
Hovercraft

Hovercraft

Amphibious transport unit.
Roles: Transportation


  • HP: 420
  • Cost: 900
  • Armor: Light
  • Role: Transport
  • Upgrades: N/A
  • Power: N/A
  • Prerequisite: Naval Yard
  • Primary Weapon: N/A
  • Secondary Weapon: N/A
Destroyer

Destroyer

Naval unit.
While its main cannon isn't always very scary, the Destroyer excels at dealing with submerged units.
Can detect submerged units.
Roles: Anti-Submerged


  • HP: 840
  • Cost: 1000
  • Armor: Heavy
  • Role: Anti Armor/Subs
  • Upgrades: N/A
  • Power: N/A
  • Prerequisite: Naval Yard
  • Primary Weapon: 155mm Cannon
  • Secondary Weapon: ASW Anti-Sub
Dolphin

Dolphin

Submerged naval unit.

Can detect other submerged units.


TIP: The dolphin can sometimes land critical hits on its target for x3 damage.


  • HP: 280
  • Cost: 650
  • Armor: T2 Light
  • Role: Anti Armor Recon
  • Upgrades: N/A
  • Power: N/A
  • Prerequisite: Naval Yard, Arsenal
  • Primary Weapon: Sonic Cannon
  • Secondary Weapon: N/A
Aegis Cruiser

Aegis Cruiser

Naval unit.
While not being able to attack any ground units, the Aegis Cruiser more than makes up for it in regards to the devastating damage it can do against air targets.
Roles: Anti-Air


  • HP: 1000
  • Cost: 1200
  • Armor: T2 Heavy
  • Role: Anti Air
  • Upgrades: N/A
  • Power: N/A
  • Prerequisite: Naval Yard, Arsenal
  • Primary Weapon: Medusa AA Missiles
  • Secondary Weapon: N/A
Hailstorm

Hailstorm

Submerged naval unit.
Due to its submerged trait, the hailstorm is great at ambushing enemy naval units.
Can detect submerged units.
Roles: Anti-Armor


  • HP: 700
  • Cost: 1200
  • Armor: T2 Heavy
  • Role: Anti Armor
  • Upgrades: N/A
  • Power: N/A
  • Prerequisite: Naval Yard, Arsenal
  • Primary Weapon: AP Shard Laser Gun
  • Secondary Weapon: N/A
Shatterer

Shatterer

Hover siege unit.
Using its long range beam weapon, the Shatterer is able to deal a huge amount of damage while keeping some distance.
Roles: Anti-Building, Anti-Infantry


  • HP: 490
  • Cost: 1500
  • Armor: T3 Medium
  • Role: Siege
  • Upgrades: N/A
  • Power: N/A
  • Prerequisite: Naval Yard, Battle Lab
  • Primary Weapon: Sonic Beam Waves
  • Secondary Weapon: N/A
Aircraft Carrier

Aircraft Carrier

Capitalship.
The aircraft carrier launches jets towards its target, allowing itself to stay out of harm's way.
Anti-Building, Anti-Armor


  • HP: 1120
  • Cost: 2000
  • Armor: T3 Heavy
  • Role: Anti Ground
  • Upgrades: N/A
  • Power: N/A
  • Prerequisite: Naval Yard Battle Lab
  • Primary Weapon: Hornet Fighters
  • Secondary Weapon: N/A